准备
开发工具及系统环境
- IDE:IntelliJ IDEA 2019.1
- 系统环境:mac OSX
项目目录结构
搭建父工程
1、 IDEA 工具栏选择菜单 File -> New -> Project…
2、选择Spring Initializr,Initializr默认选择Default,点击Next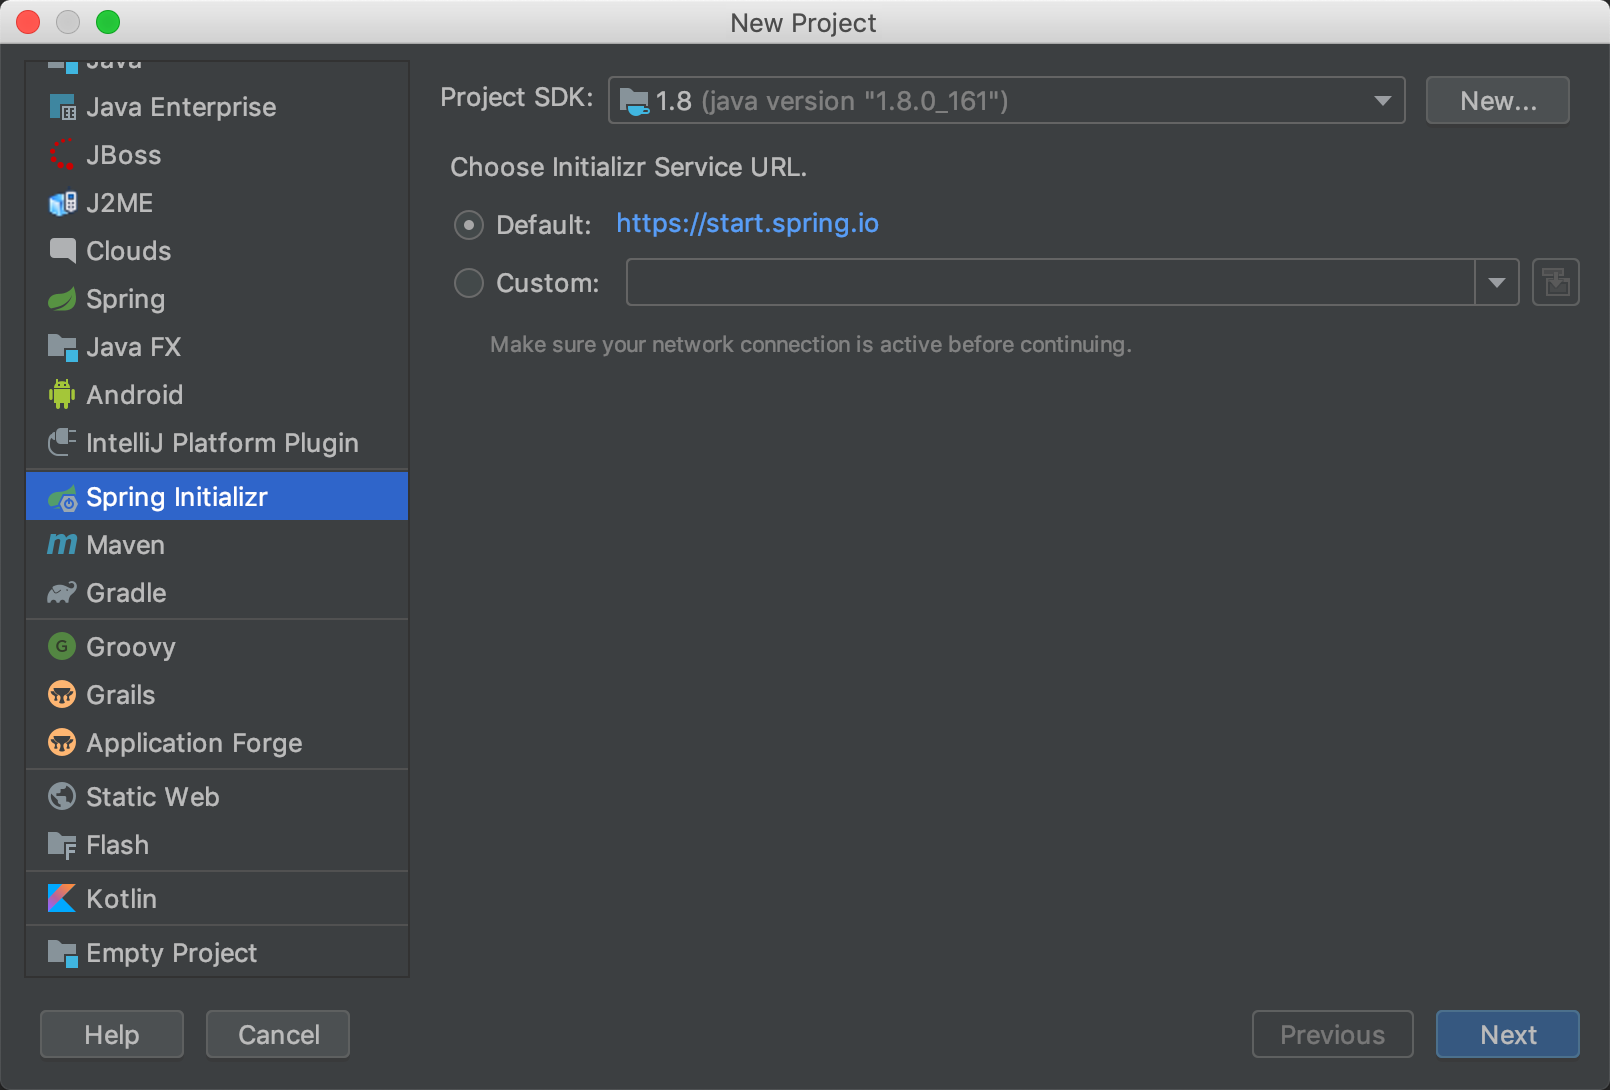
3、填写项目资料,点击Next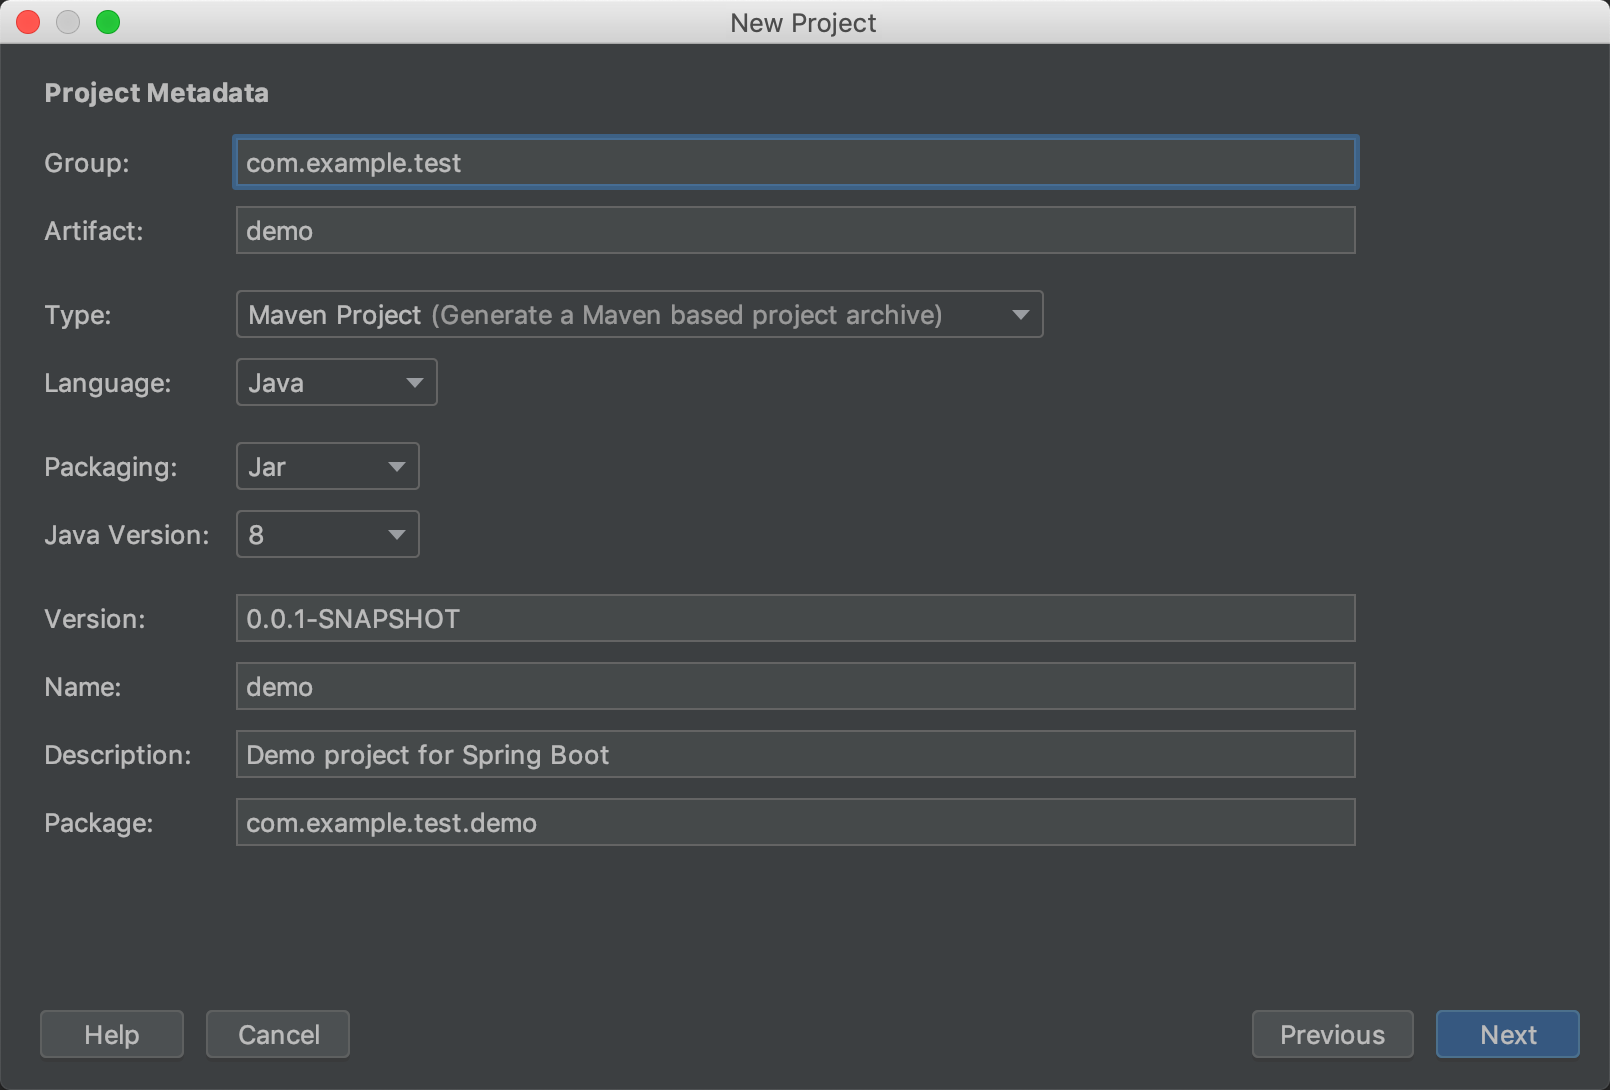
4、直接点击Next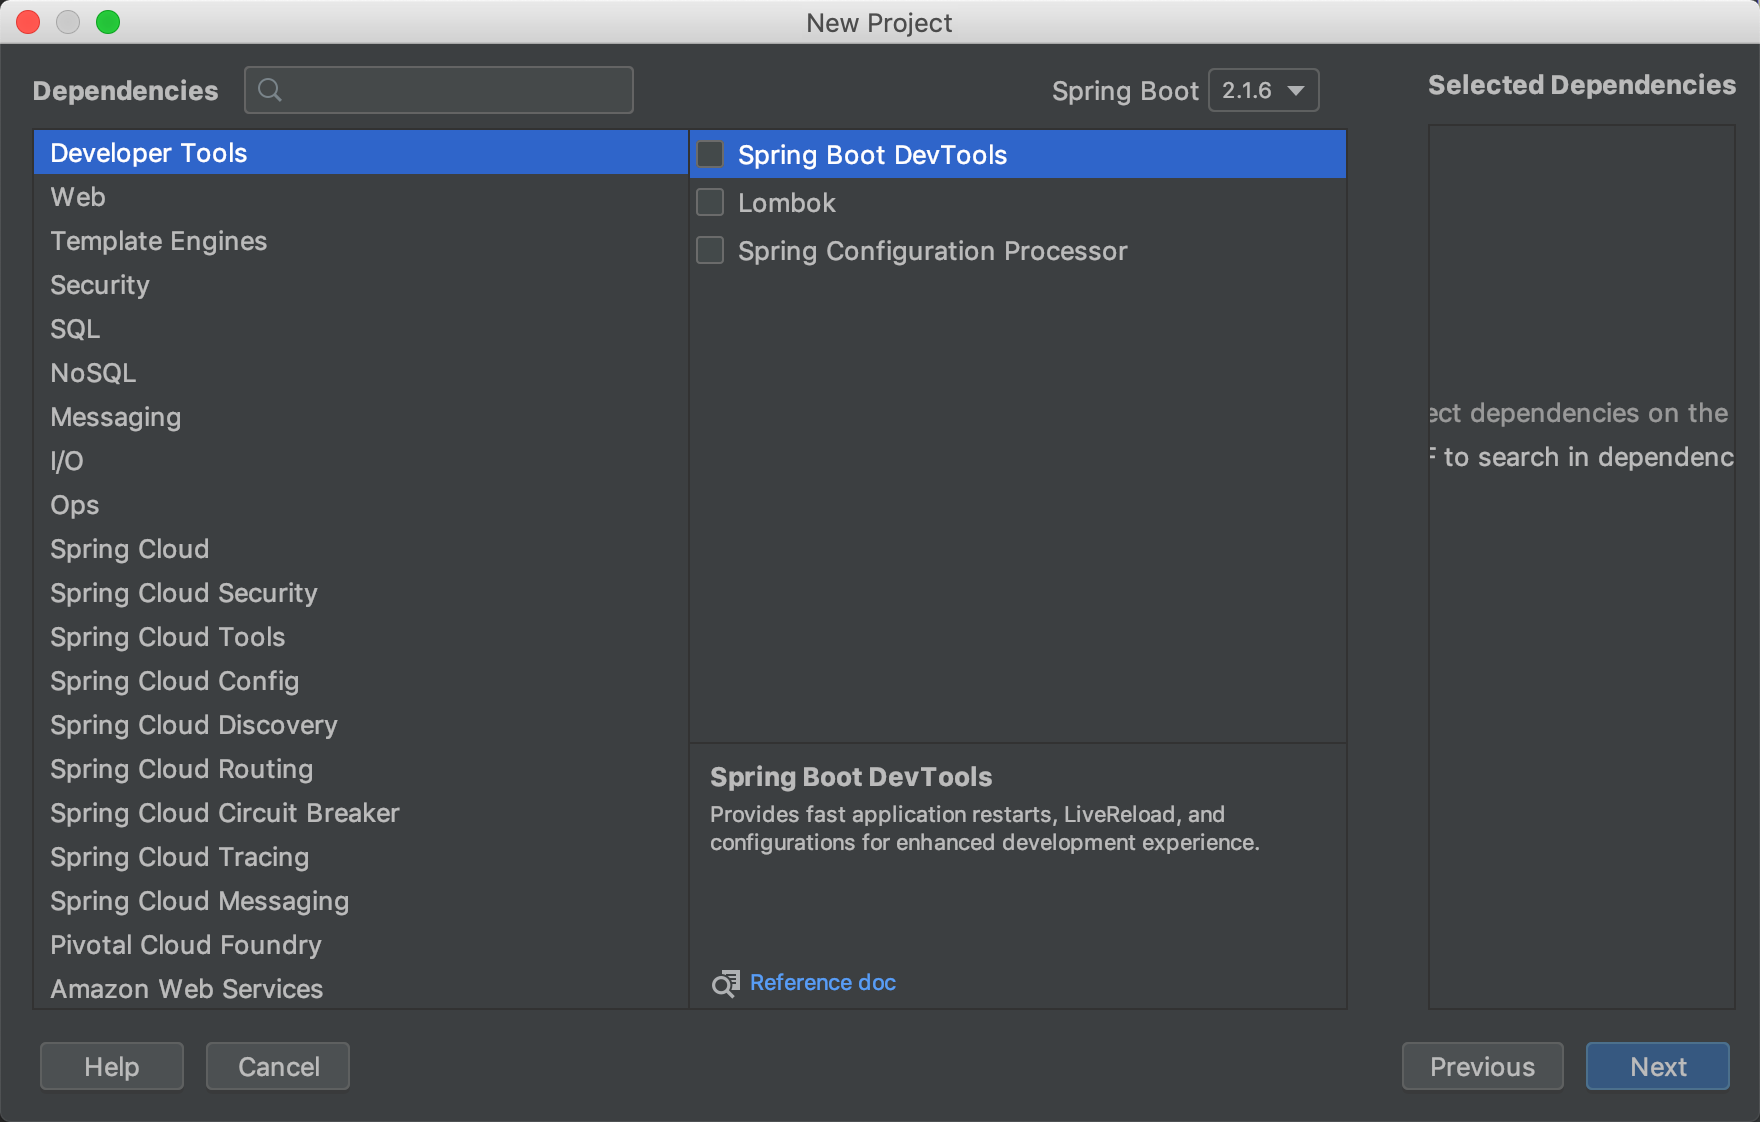
5、填写name,点击Finish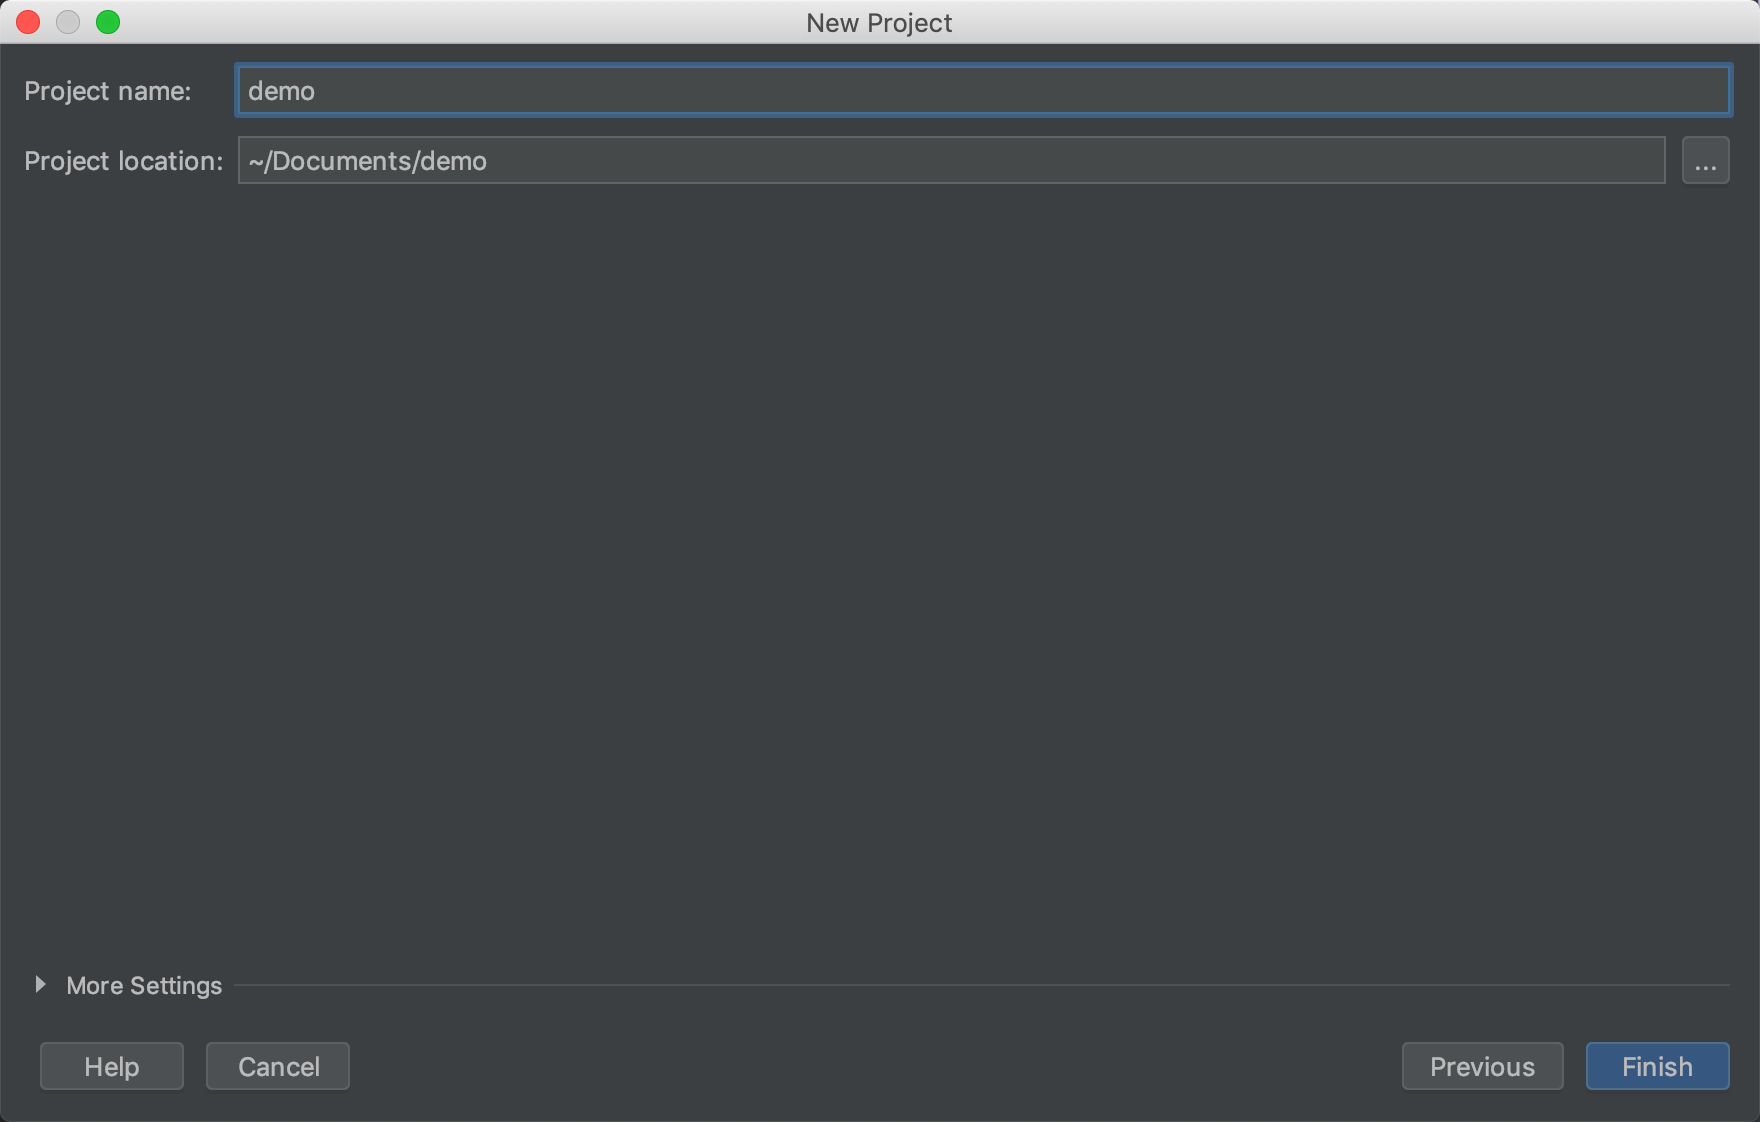
6、项目结构如下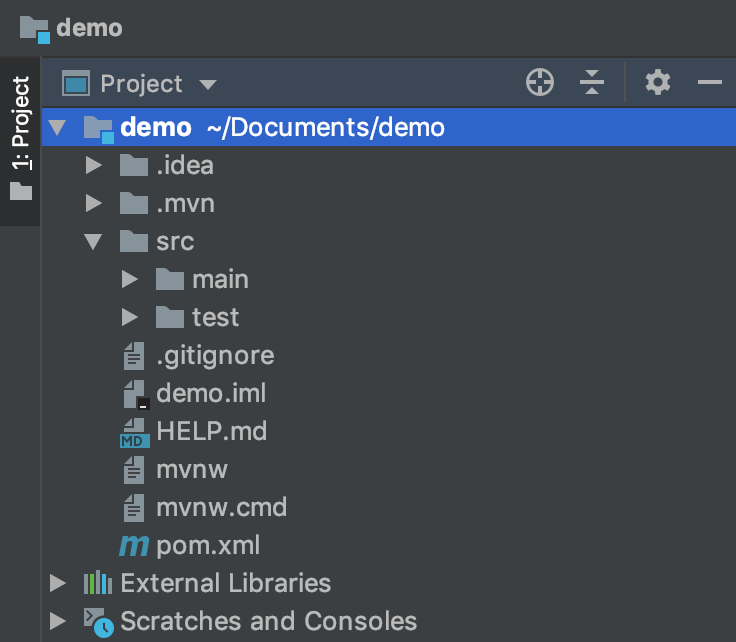
7、删除多余目录,只留如下结构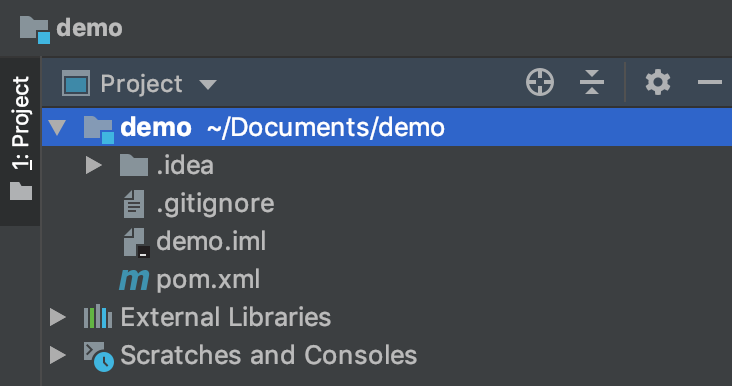
创建子模块
8、选择项目根目录,右键->New -> Module
9、选择Maven,点击Next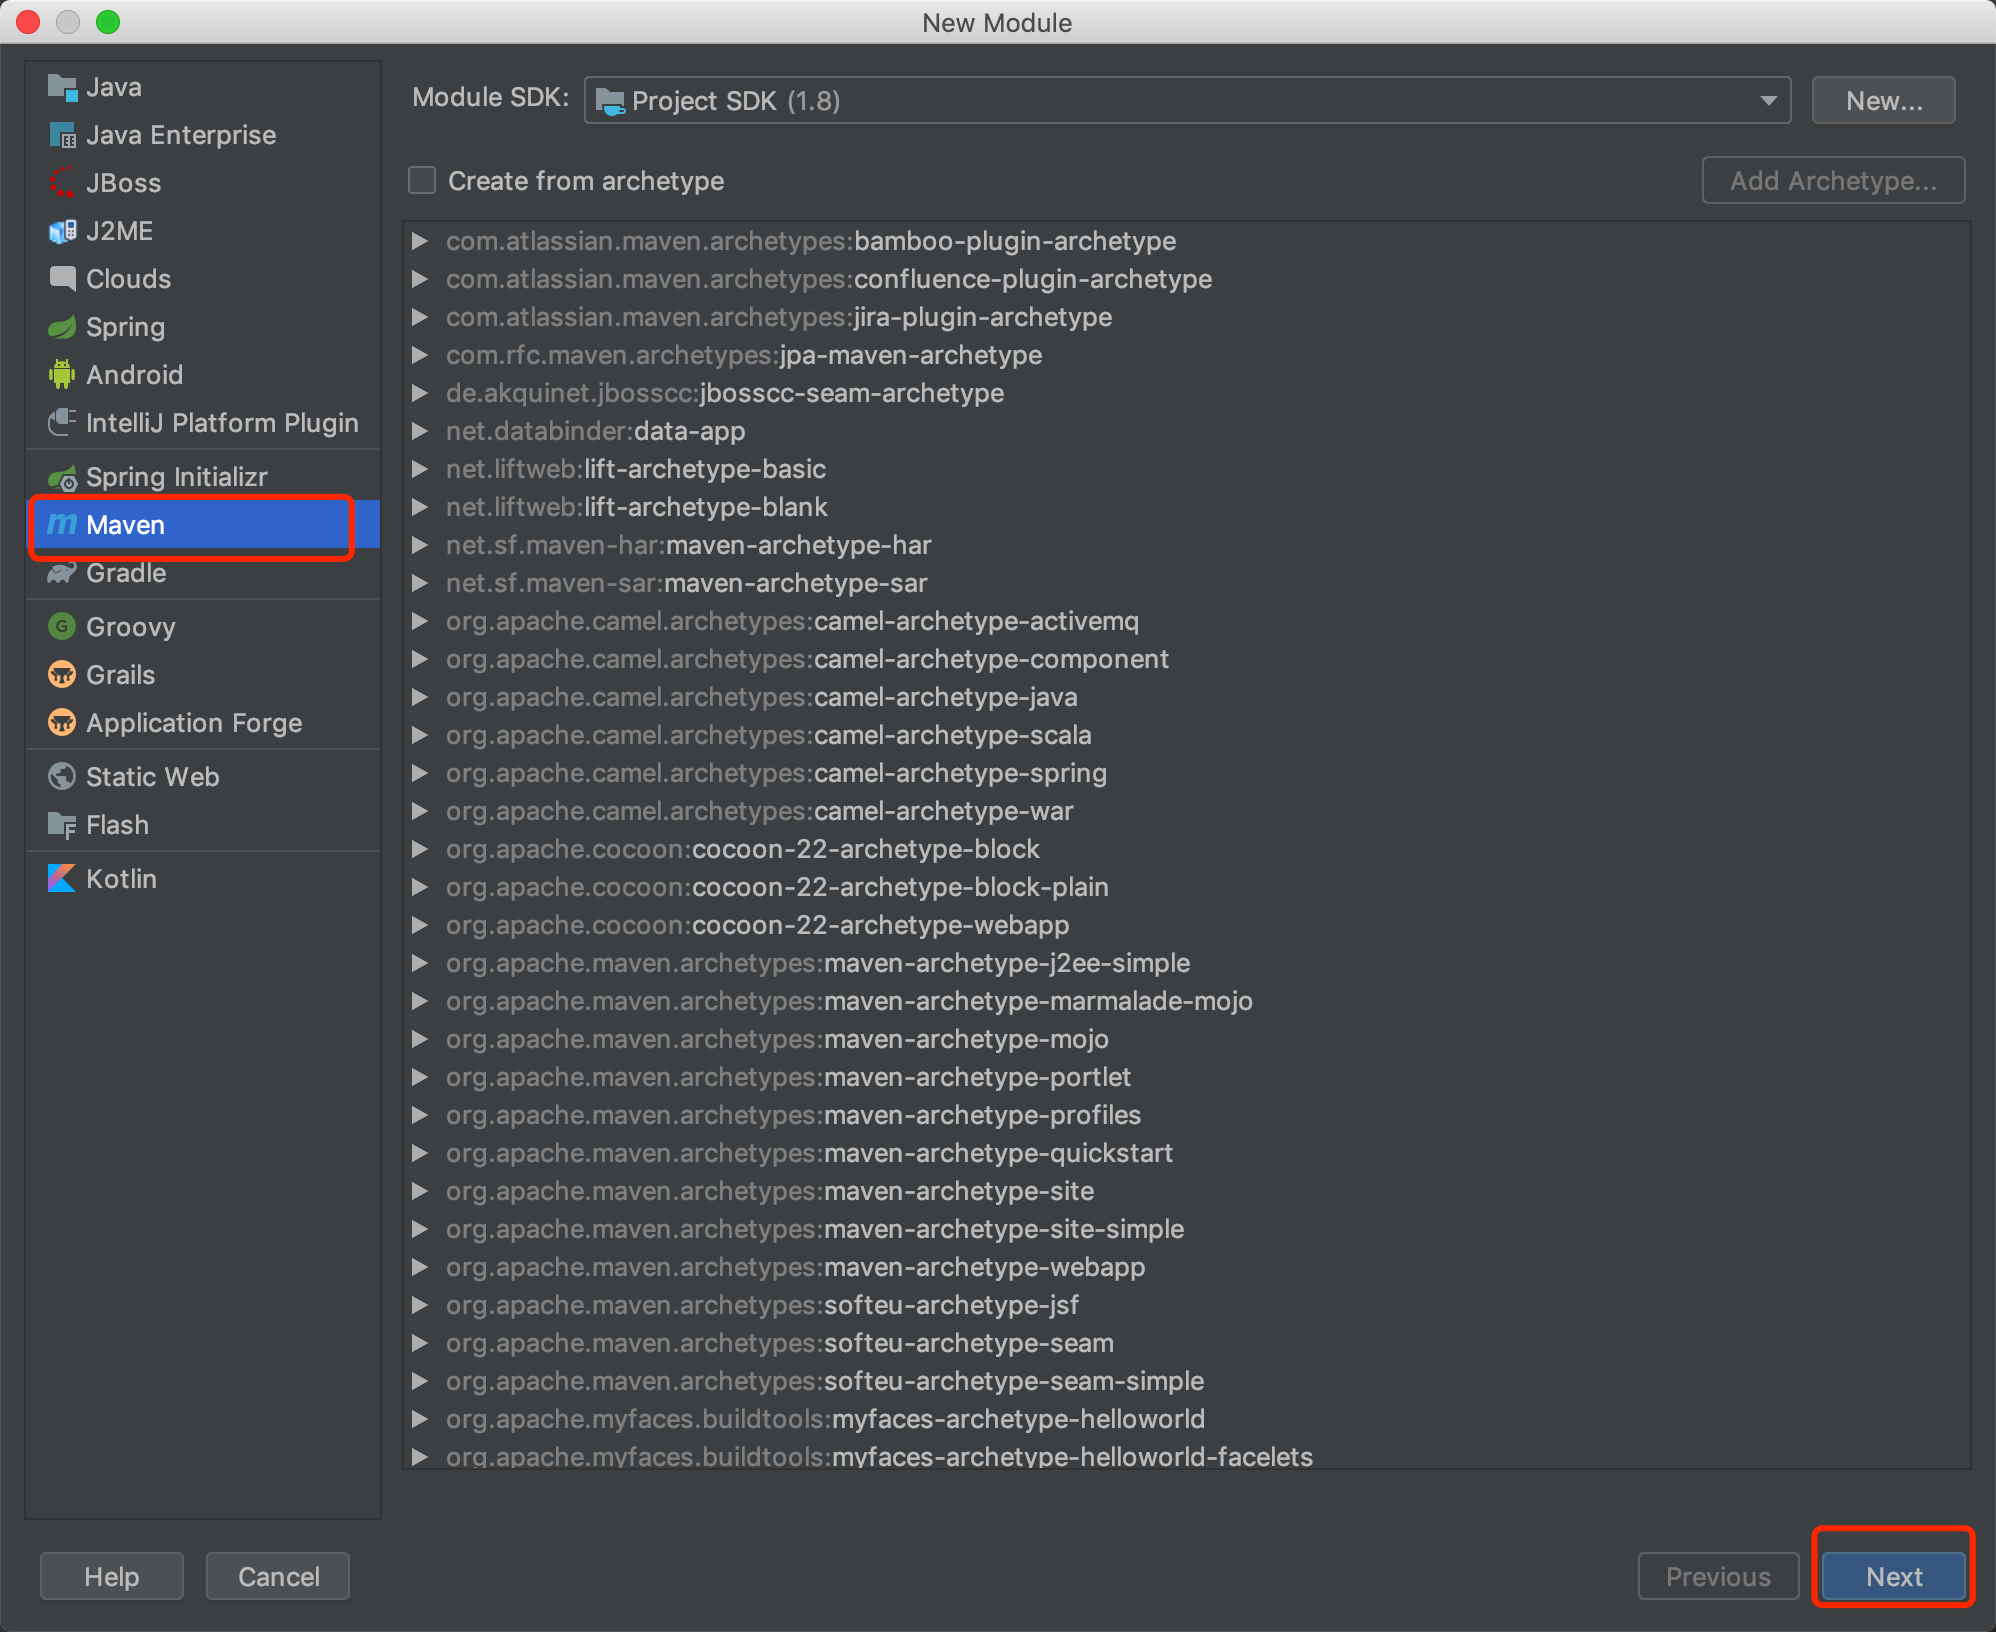
10、填写ArifactId,点击Next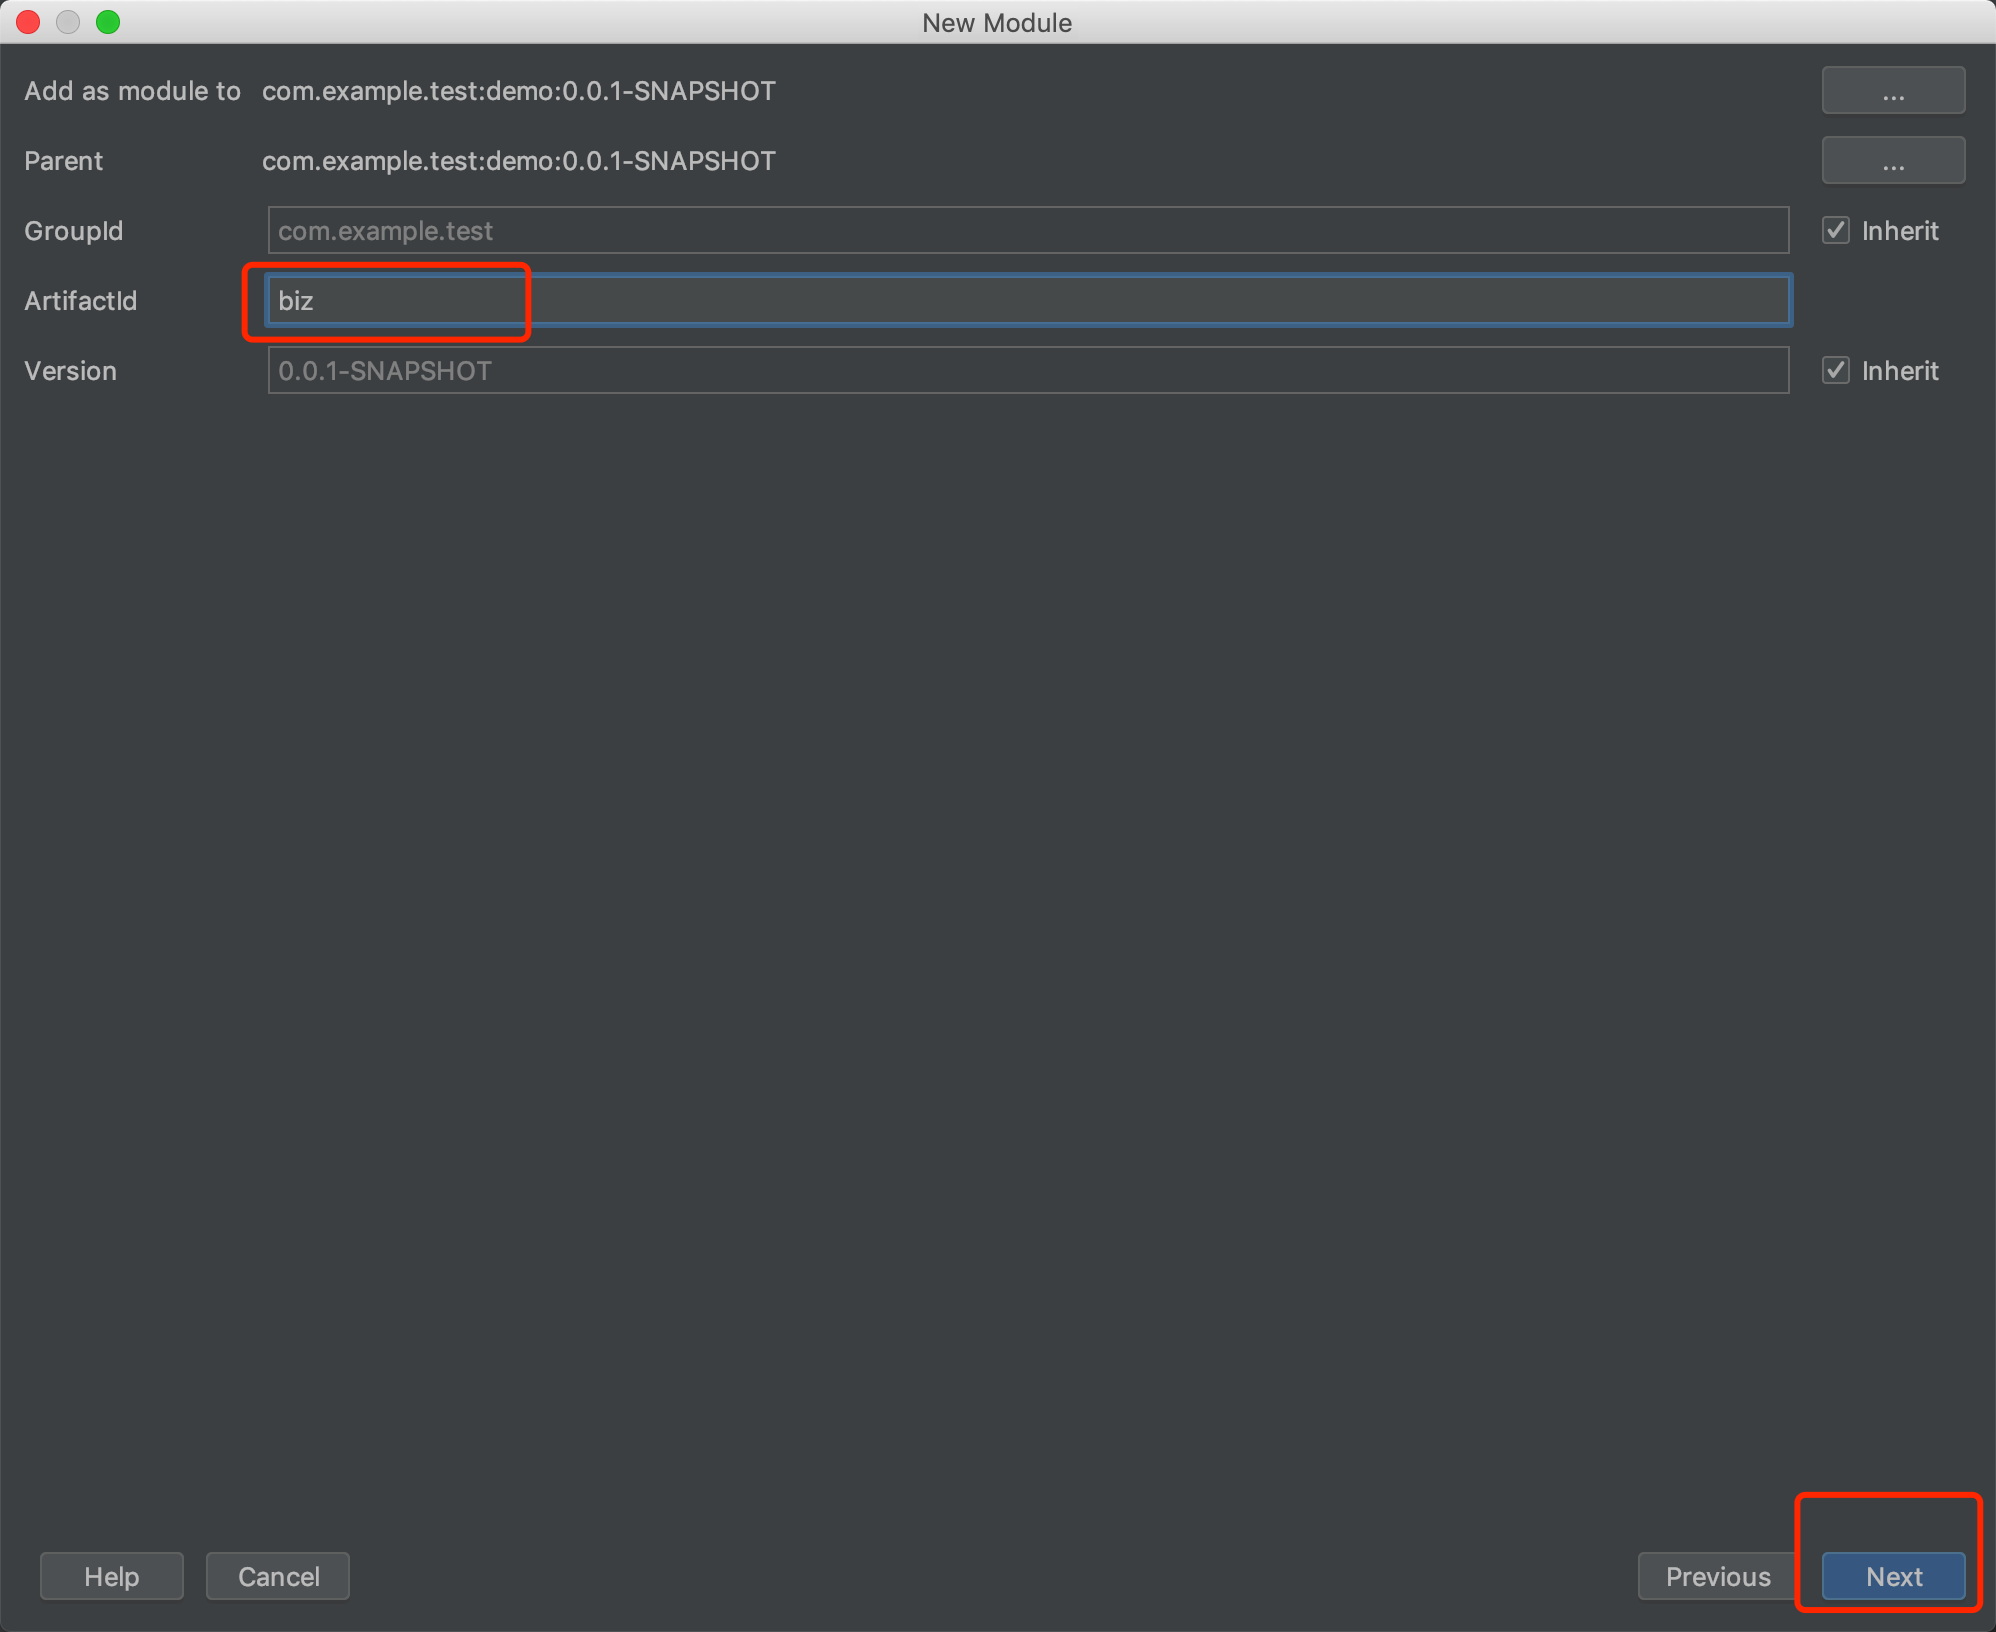
11、点击Finish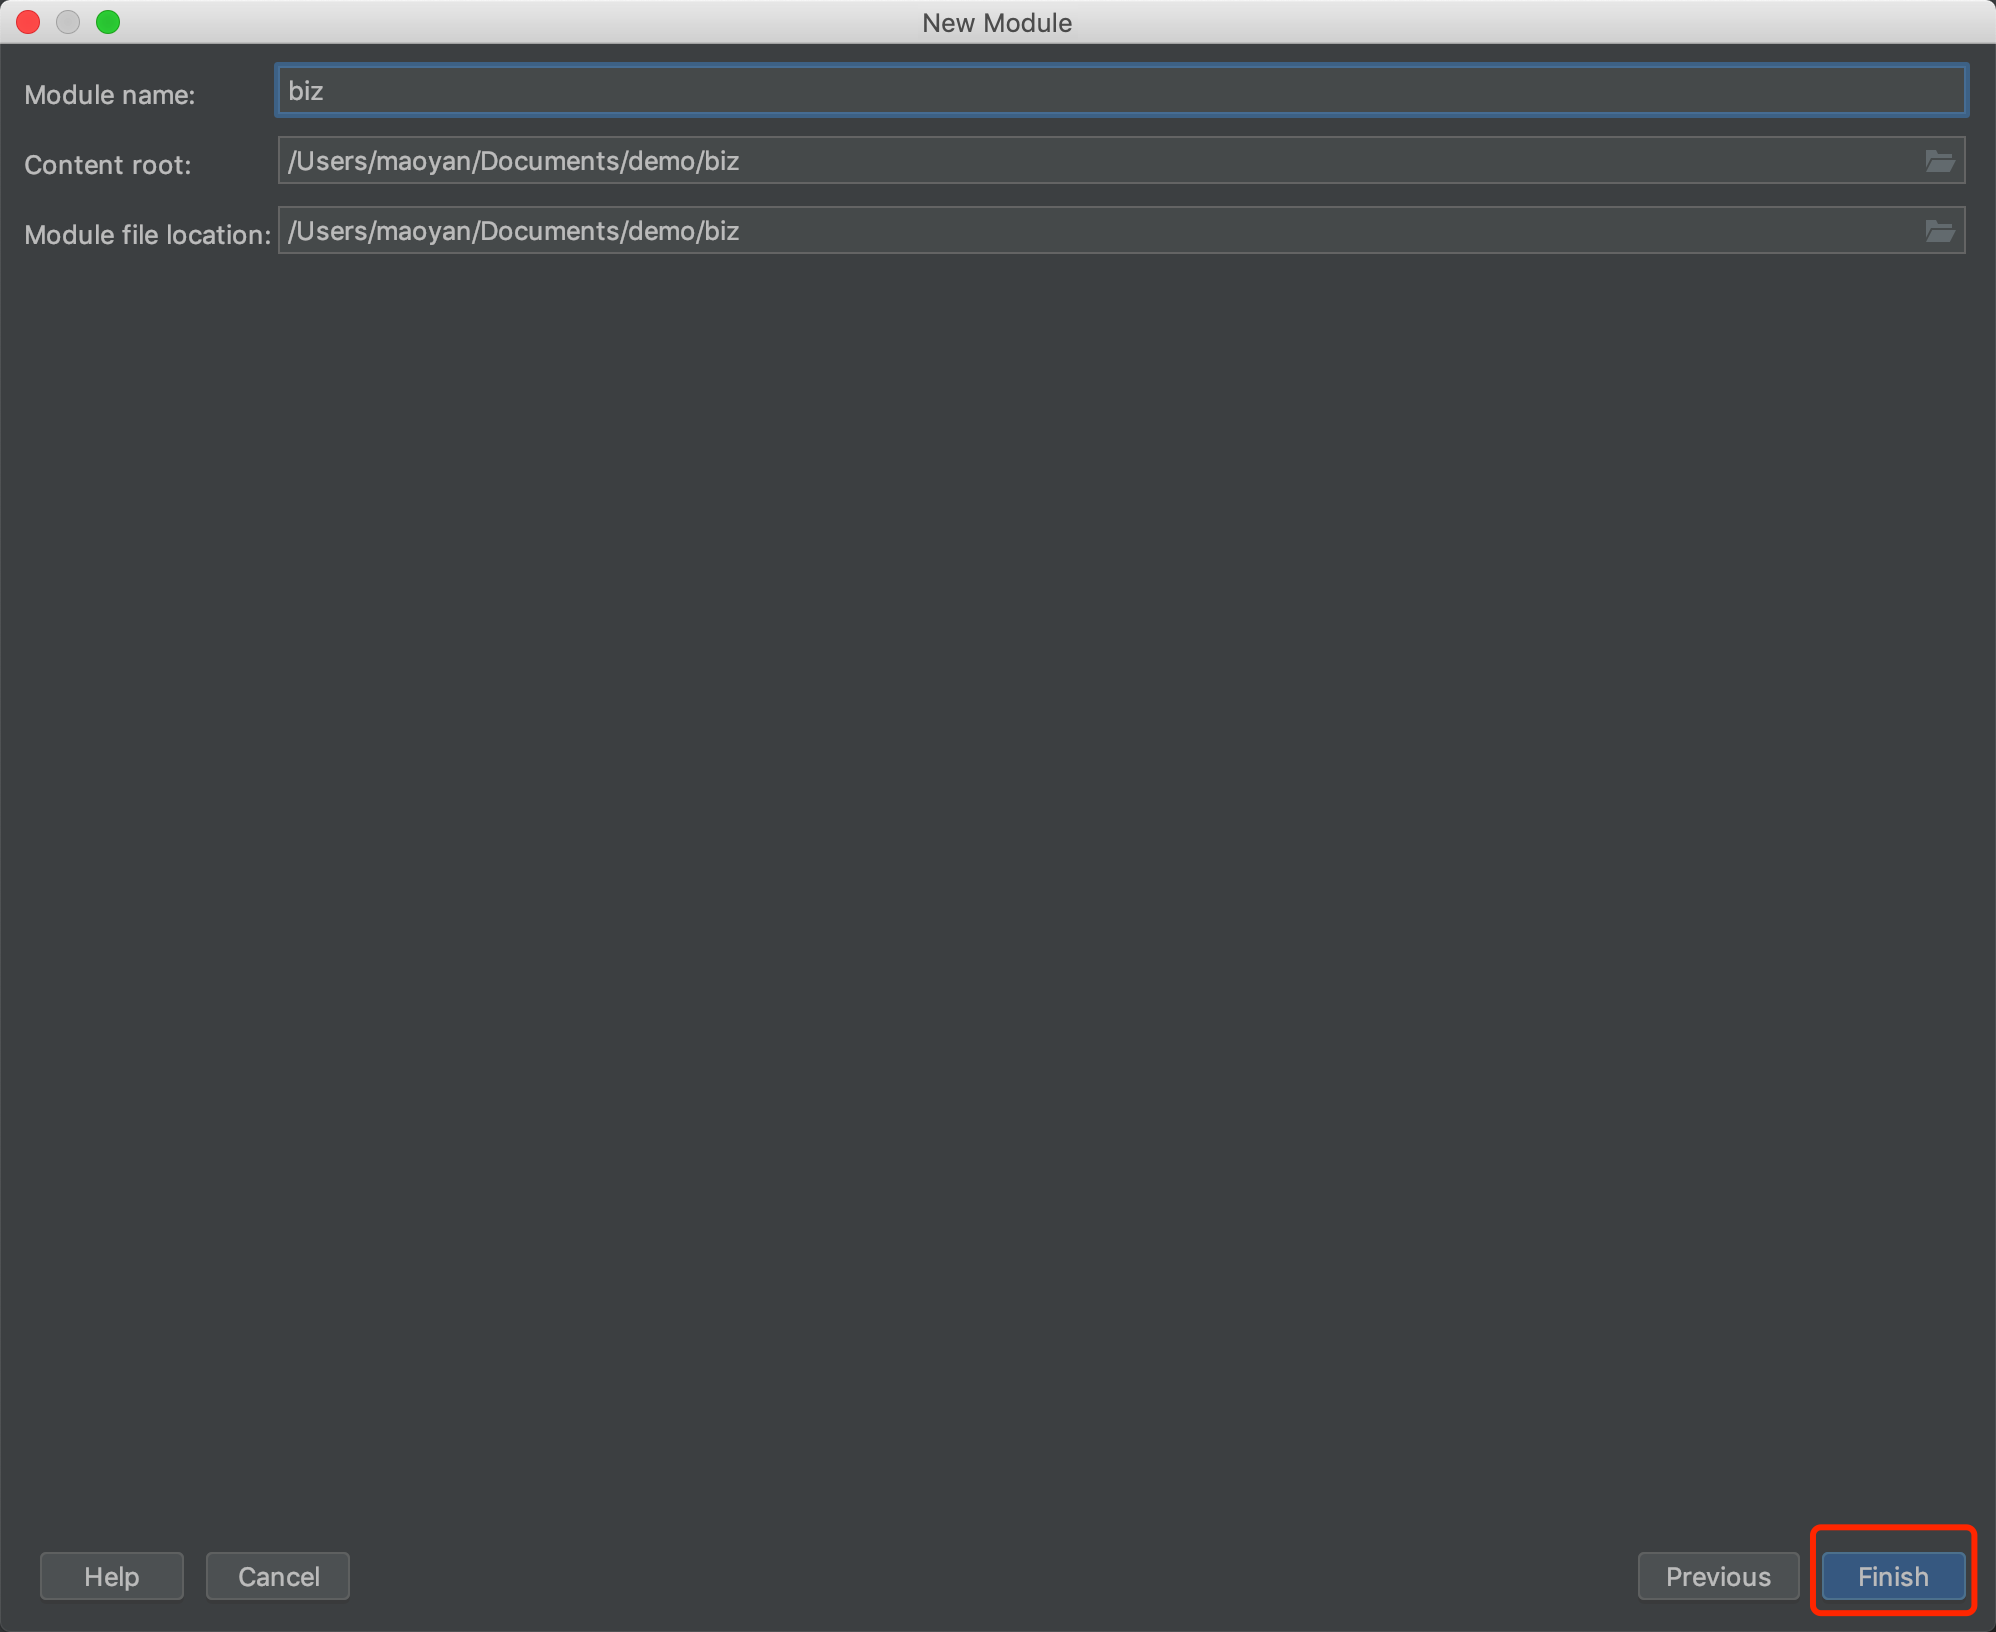
12、同理添加其他子模块,最终项目目录结构如下图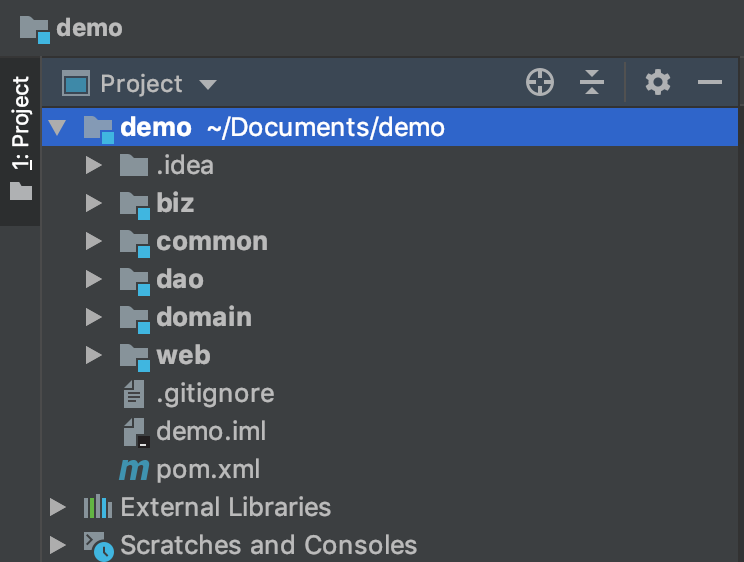
模块间依赖关系
各个子模块的依赖关系:
- biz层:依赖dao层,common层
- dao层:不依赖
- common层:不依赖
- web层:依赖biz层,common层。
13、父pom文件中声明所有子模块依赖
1 | <dependencyManagement> |
14、biz层pom文件中添加dao层,common层依赖
1 | <dependencies> |
15、web层pom文件中添加biz层,common层依赖
1 | <dependencies> |
运行项目
16、在web层pom文件中添加spring-boot-starter-web
1 | <!-- spring-boot --> |
17、在web层创建com.example.test.demo.web包并添加入口类AppServiceApplication.java,目录结构如下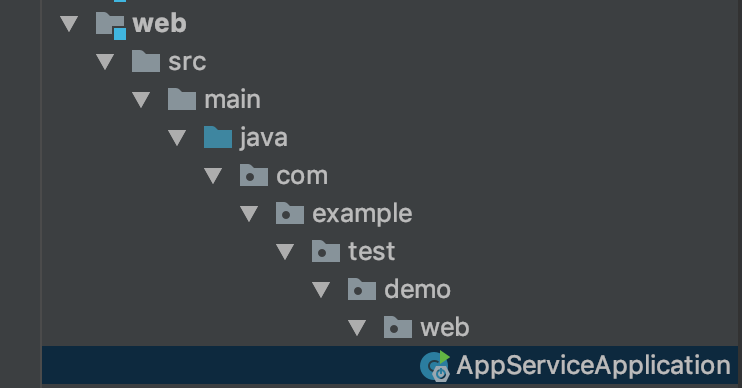
入口类代码如下:
1 |
|
18、在com.example.test.demo.web包下创建controller目录添加test方法测试接口是否可以正常访问
1 | package com.example.test.demo.web.controller; |
19、运行AppServiceApplication中的main方法启动项目,默认端口为8080,访问http://localhost:8080/demo/test得到如下效果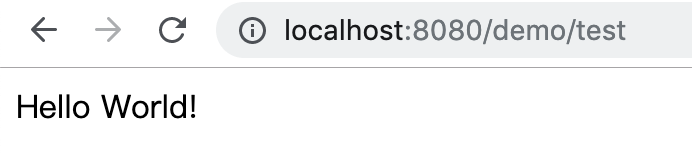
20、在biz层创建com.example.test.demo.biz包并创建DemoService接口类代码如下:
1 | package com.example.test.demo.biz; |
21、在com.example.test.demo.biz包下创建impl目录并添加DemoServiceImpl类,代码如下:
1 | package com.example.test.demo.biz.impl; |
22、DemoController类通过@Autowired注解注入DemoService,修改DemoController的test方法,代码如下:
1 | package com.example.test.demo.web.controller; |
23、在入口类AppServiceApplication上添加@ComponentScan注解
1 | package com.example.test.demo.web; |
24、更改完之后运行main方法,访问http://localhost:8080/demo/test得到如下效果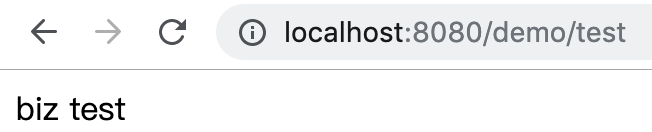
25、其他层同理验证。
集成Mybatis
26、父pom文件中声明mybatis-spring-boot-starter、mysql-connector-java等依赖。
1 |
|
27、在dao层中的pom文件中添加以下依赖
1 | <build> |
28、在web/src/main/resources下添加application.properties
- com.mysql.jdbc.Driver 是 mysql-connector-java 5中的
- com.mysql.cj.jdbc.Driver 是 mysql-connector-java 6中的
1 | = com.mysql.cj.jdbc.Driver |
29、在web/src/main/resources下添加mybatis-generator.xml配置内容如下
1 |
|
30、根据表自动生成对应的Mapper以及po类,步骤如下。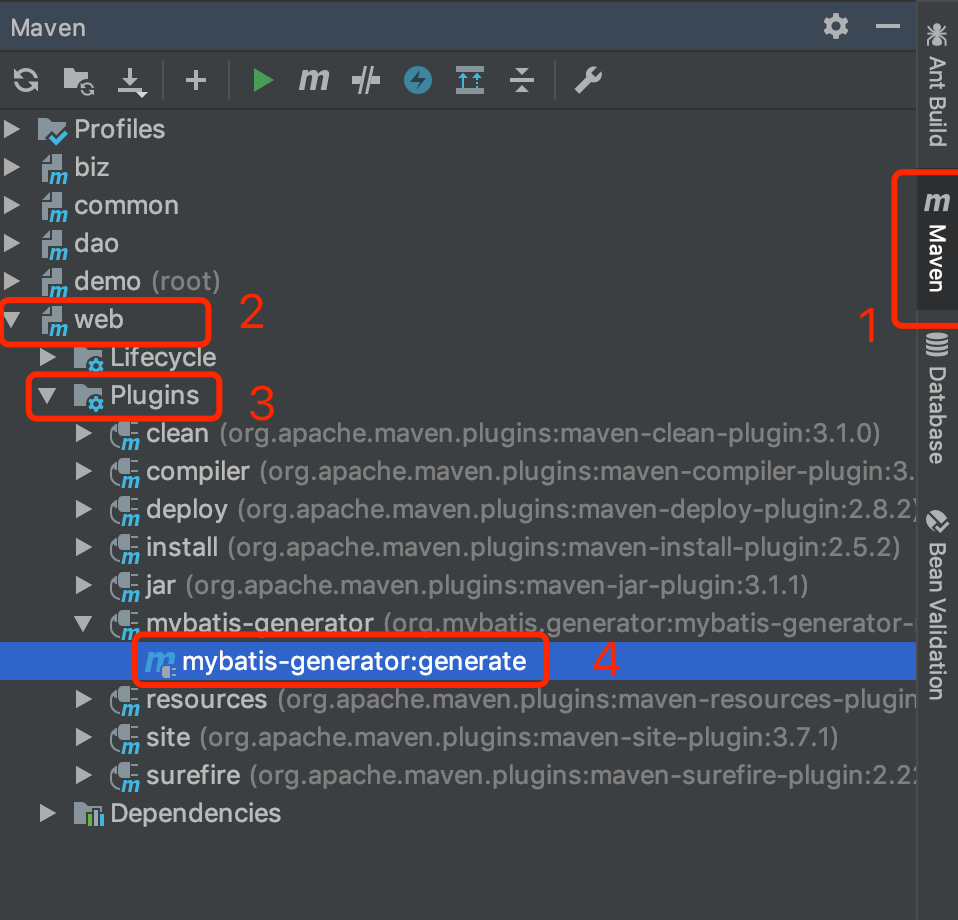
得到目录如下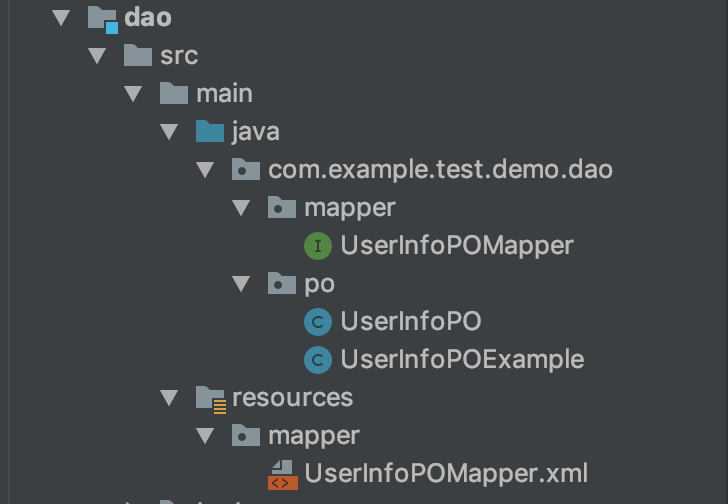
30、biz层下DemoServiceImpl通过@Autowired注解注入UserMapper,修改DemoService的test方法如下:
1 | package com.example.test.demo.biz.impl; |
31、在入口类AppServiceApplication上中添加注解
1 |
32、运行main方法启动项目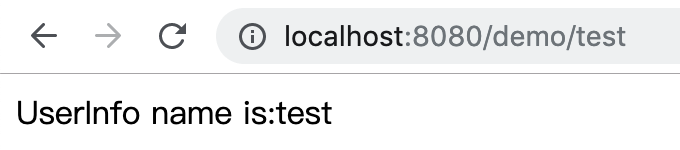
遇到的坑
mybatis 自动生成时遇到
Client does not support authentication protocol requested by server; consider upgrading MySQL client
解决方法登录mysql:
1 | ALTER USER 'root'@'localhost' IDENTIFIED WITH mysql_native_password BY 'qwertyui'; |